First Steps

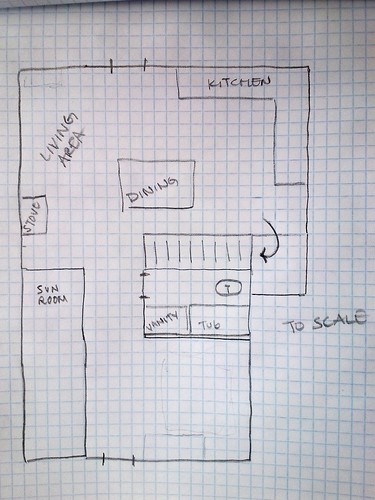
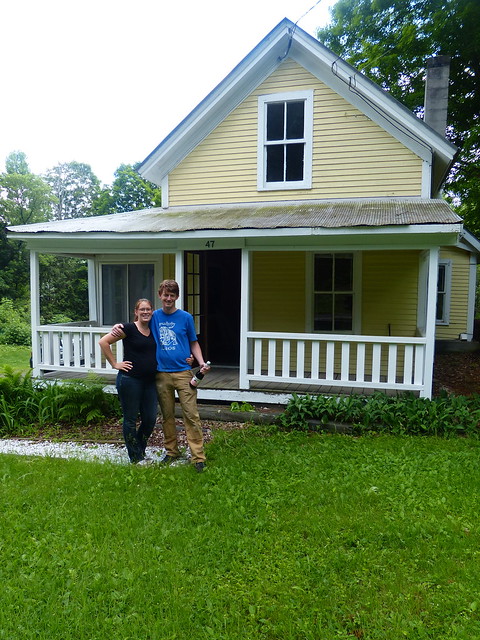
The two major renovation projects on our list are relocating the stairs and the bathroom. Chandler tackled building the new bathroom walls and completely redoing all of the plumbing. That took up pretty much all of his time, so, I was in charge of the stairs. If you have never built stairs before, let me start by stating, they are complicated.

The stair case I am building is L-shaped, meaning there is a landing in the middle where the stairs take a 90° turn. While this style will fit our house better, it makes the construction a little more complicated. The first step (ha ha) is to build the landing, which must be a specific height. The complication arises because our floors are really uneven. So, first floor to second floor height is different where the stairs will begin, end and the location of the landing. After much deliberating and repeated measurements, I settled on a final height and began building.

Next came the stringers. I had done all the calculations for the rise and run and could only hope it worked out. After laying our my measurements on the 2×12, it was time to cut.

photo

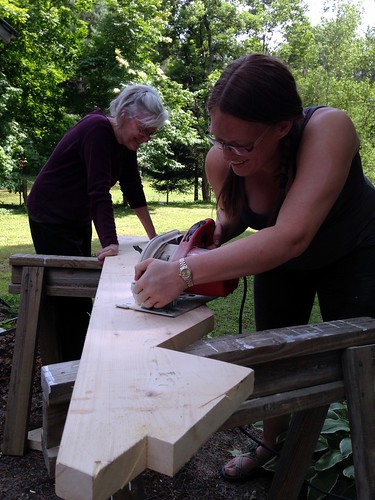
Hope I don’t mess up

Surprisingly, my stringer fit perfectly!

P1070002

Success!

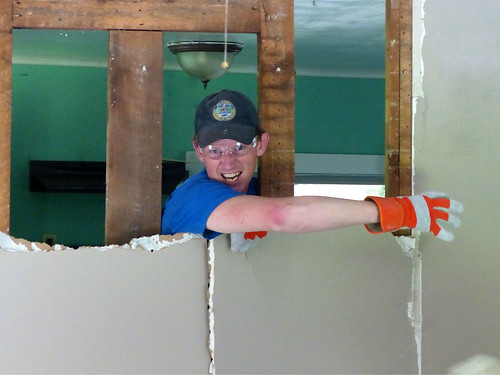
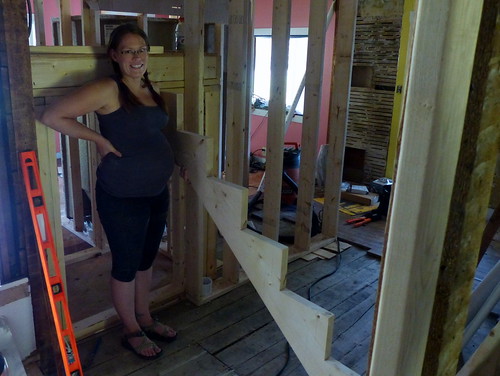
At this point, we could get more than half way up to the next floor, but I couldn’t continue until we opened the ceiling. This felt like a big step, only because it would be a lot of work if we changed our minds.

P1070008

Opening the ceiling

Discoveries

Our first weekend in the house was a busy one. Chandler’s parents came down to help with the demolition, so we got a surprising amount done.

The house is divided into two areas, the front and the back, by a set of stairs. The front of the house is divided by a partition wall and the back of the house is divided into the kitchen and a bedroom. We immediately went about tearing down the kitchen/bedroom wall and the partition wall.

P1060973

Chan’s Kool-Aid Man moment

Safety first

Safety first

Under the drywall, wainscoting and layers of wallpaper, we found lath and plaster walls. While this form of construction was used until drywall was introduced in the 1950s, our walls were much older. The evidence was in the cut nails used to attach the lath to the studs. Cut nails were manufactured from the 1820s to the 1910s.

nails

Nails

Wallpaper

Wallpaper is holding the house together

As Steve was tearing into the lath and plaster, something came out of the wall besides spiderwebs and mouse nests. Hidden in the wall was a time capsule! The actual container and most of the newspaper was destroyed by critters, but the other items were intact enough to identify.

Among the debris we found the core of a baseball, a small clock, a lady’s shoe and an American flag with 43 stars. Chandler found a piece of a newspaper dated August, 1893 containing an article describing achievements of President Hayes, who had recently passed away. We were told the house was from the early 1900s, but the artifacts show part of it was built a bit earlier.

American Flag

American Flag

shoe

Lady’s shoe

Design stall

While we initially hit the ground running, we came to a stand still during our second week in the house. The current floor plan is atrocious with a tiny kitchen and the main living area situated in the front of the house near the traffic noise and less natural light. The bathroom is cramped and poorly laid out.

We have spent countless hours contemplating alternative floor plans. Our main objective is to move the bathroom and stairs to a less desirable area of the house and to create a sound buffer from the street noise. Once we have an idea of something we like, it gets laid out on the floor with masking tape.

IMG_20140623_132730

One idea of many

We have gone through so many variations it is hard to think of new ideas that make sense. The masking tape makes our ideas easier to visualize and point out any potential problems.

While I am inclined to start work, Chandler continues to mull things over making sure that everything will work. It’s one thing to draw where everything goes, but a new bathroom will have a bunch of plumbing attached to it, and cutting a hole through the ceiling for stairs requires some mild structural analysis, etc. I want to make sure we are happy with our decisions, because we won’t be able to change them when the little one comes. However, I keep thinking that the clock is ticking down to October.

Big news

Our original Vermont daydream involved finding a large piece of land and building an off the grid house. Eventually we’d add a few goats, dogs and kids to the mix over the years. Our daydream is now being fast-forwarded because we are expecting our first child this October!

While our dream of building our own home is currently on the back burner, we will get some practice this summer. Our offer on a cute, little home with almost an acre of land, in a small Vermont village, was accepted. The house was built in the early 1900s and needs to be completely gutted and remodeled. We will have our work cut out for us.

P1060907

Our little yellow house

Big changes on the horizon! We’ll be updating here as we embark on our next “project”.

Making things cozy

We have been living in the cabin on and off throughout the winter, depending how far below 0°F the temperature dipped. It took a little bit of time to get into the swing of things, but now we have a good system down. A fire is still needed most nights and we fall asleep to the sound of peepers.

There wasn’t much to work on during the harshest parts of the winter. I have noticed since returning from our trip, it is difficult for me to just sit around and be idle for long, but the long and very cold weather has zapped a lot of our motivation. With spring finally here, I feel the need to be constantly doing something. Before, that would be cycling, writing the next blog post or exploring a new place. So, in order to have another project, I have begun putting up the interior walls.

IMG_9345

Camelot

We were originally going to put up some free wood from Chandler’s uncle, but upon further inspection, the wood might have mold in it. Not wanting to take a chance, our next cheapest option was spruce and hemlock shiplap. Jeanne and I took a field trip to the lumberyard and discovered it would fit our needs perfectly.

The shiplap went up quickly around the door. I had no problem lining the boards up straight and made good time. When I moved onto the next wall, things went downhill. I was using longer boards and things weren’t lining up so nicely. The boards are slightly bowed in different ways and I found myself halfway through and very unhappy with the results. I ended up taking down half the wall and starting over.

IMG_9346

Shiplap wall

IMG_9348

Stove and finished wall

Once I convinced Chandler and Tayler to help, it was smooth sailing. The second wall was done in a day. The next wall has a stove pipe running through it and needs to be disassembled. We got about three inches of snow last week, so the stove is still being used. Whenever summer arrives, we’ll get the interior done.